
In this semester, I chose a data science unit, which caused me to use jupyter. I have never used jupyter and got in touch with data science before. After knowing what is jupyter notebook, I thought that running it on cloud is better than local. Fortunately, the official has already released different kinds of docker images of jupyter notebook for different purposes. This post is going to introduce how I deploy jupyter notebook on my home server and expose it to the Internet.
The post assumes that the jupyter server will only serve for the owner instead of multi-user.
Run Jupyter on Docker
Image Choosing
If you still don’t sure which image you should use, you can check here.
For example, our lecturer said we need to use pandas in this unit, then I search keyword
pandason the webpage. I foundjupyter/scipy-notebookis the way to go.
If you have no experience like me, I will recommend the lightest one.
Create Working Directory
Since jupyter runs in docker, you need to prepare a folder that your jupyter server has read/write authority.
By the way, jovyan is the default user of jupyter and its docker image.
|
|
Run the Container
Then run your jupyter server on docker.
|
|
Jupyter Configuration
Then your jupyter server should works locally right now. You still need some configuration before use.
Set Password
By default, jupyter is authorized by token. However, getting token is not convinent for remote access because you need to go inside of the container and execute a command to get the token. If you want to change the vertification mean to password, at first time, you still need to login with token.
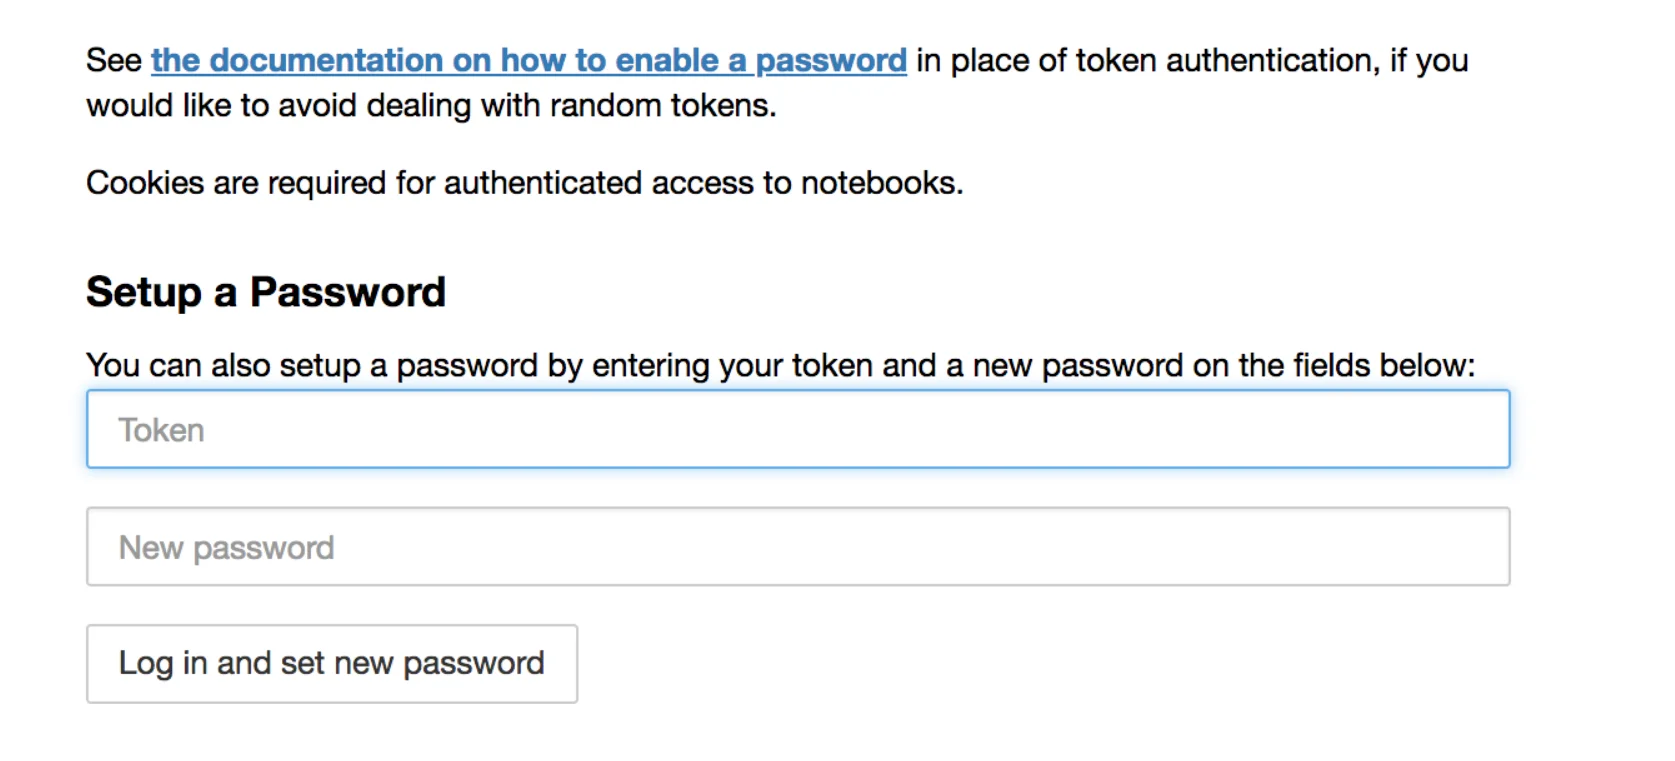
|
|
After that, you could login in with password.
Allow Remote Access
If you check the working directory after setting password, you will find there is a new file called jupyter_server_config.json.
It should look like this:
|
|
However, jupyter server cannot be accessed remotely by default. You can enable it in the configuration.
|
|
Don’t forget to restart your jupyter:
|
|
Expose on the Internet
Rathole Configuration
Then, your jupyter server is ready to be exposed. This time I will use the same tool as the last time, rathole. (If you don’t know what it is, you can check here)
Reverse Proxy
Jupyter includes http and websocket, so you need to proxy for both.
Here is my configuration for reverse proxy using nginx:
|
|